Overview:
N3 Open API allows developers and third-party systems (e.g. e-commerce, POS, CRM, mobile apps or reporting tools) to read and update data in N3 securely. This article guides you to log in to the Open API (Swagger) page, get an access token, authorize it, verify the connected company and switch to another company, so you can test the API before starting your integration.
Scenario:
The customer wants to connect their own system or a third-party application to QNE N3 to retrieve or post data (e.g. customers, items, sales invoices). As N3 is a cloud system, the integration is done through N3 Open API instead of a direct database connection. The steps below show how to connect and test the API using the Swagger page.
Solution:
Part A – Get Access Token
1. Go to the N3 Open API page: https://openapi.account.qne.cloud/doc/index.html#/
Make sure Select a definition at the top right shows QNE Platform API.
2. Under the Auth section, look for POST /api/Auth/Token.
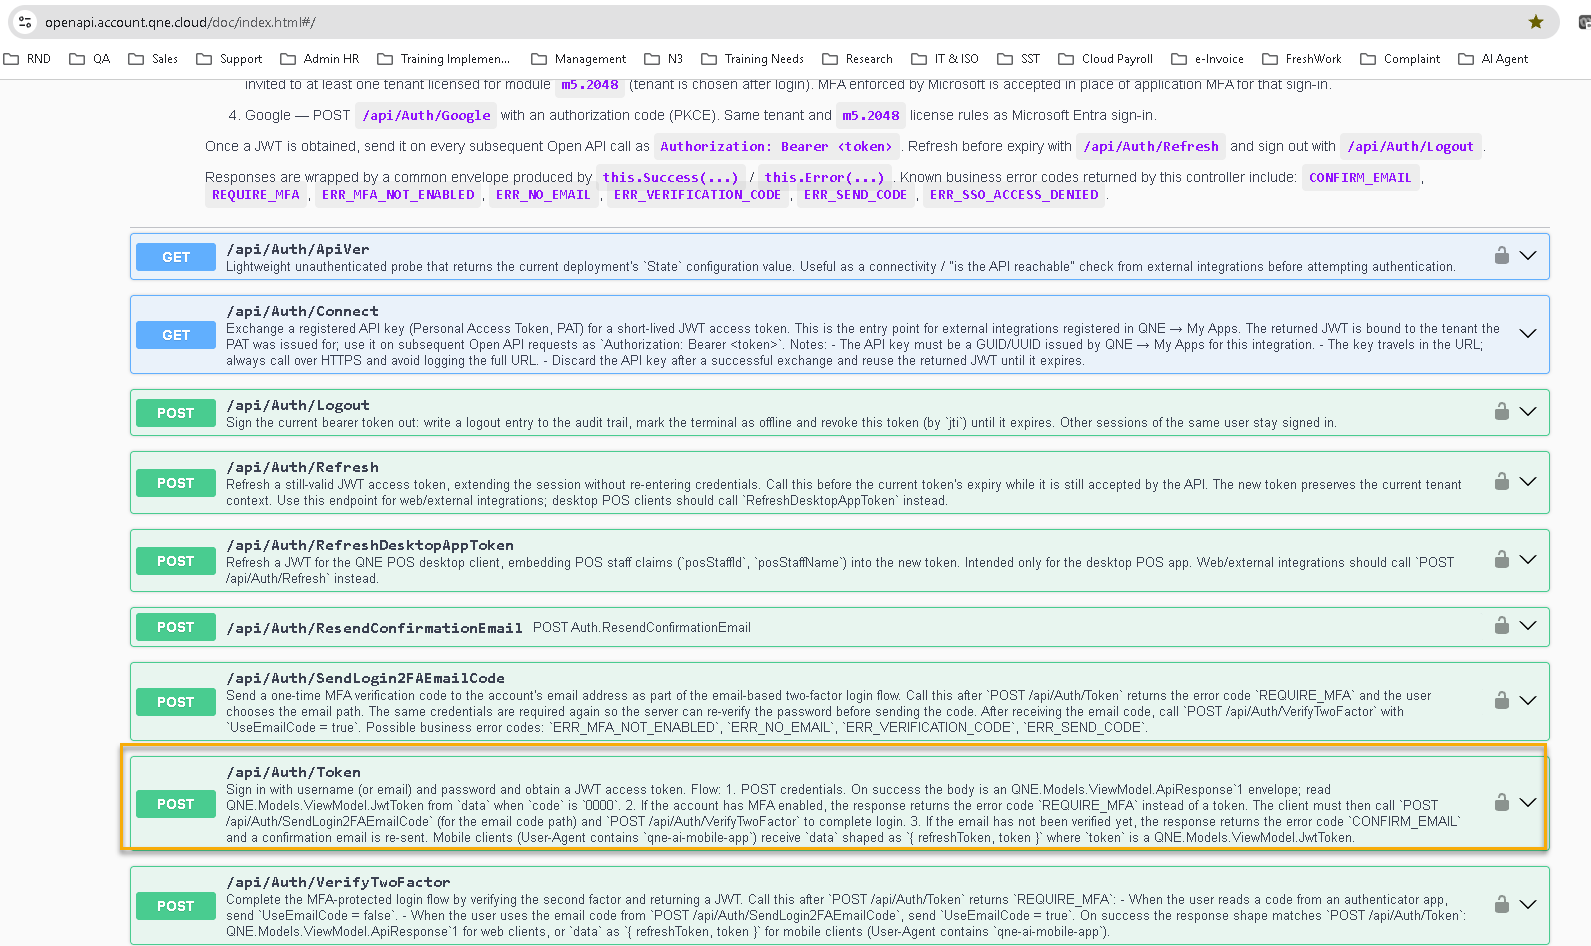
3. Click on /api/Auth/Token to expand it, then click Try it out.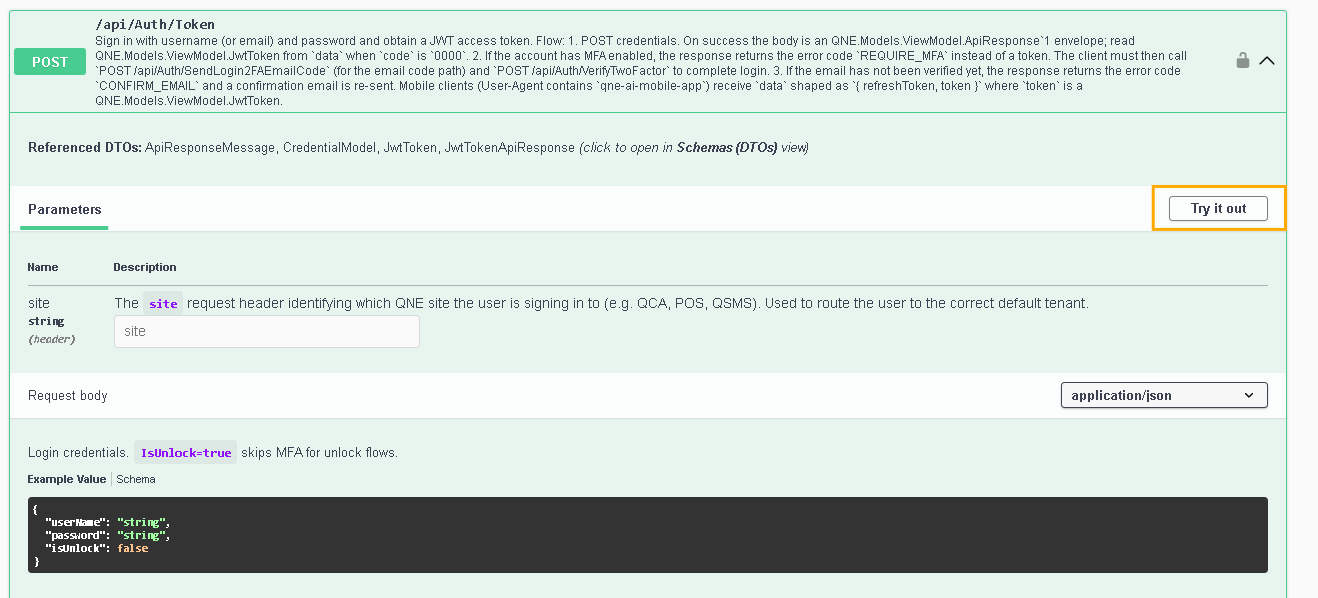
4. In the Request body, replace “string” with your N3 login email/user name and password, then click Execute.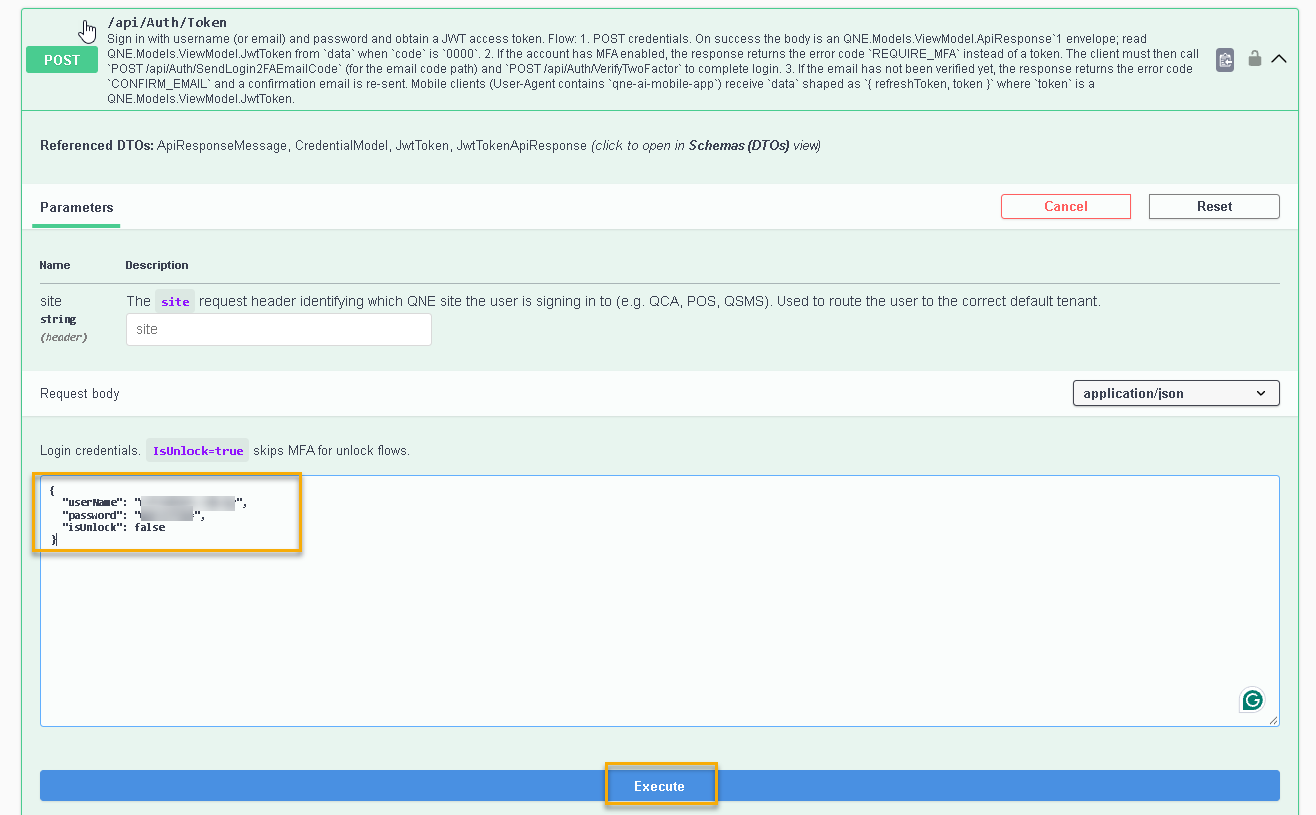
Note: If your account has MFA (two-factor) enabled, the response returns REQUIRE_MFA instead of a token. Complete the login with POST /api/Auth/VerifyTwoFactor.
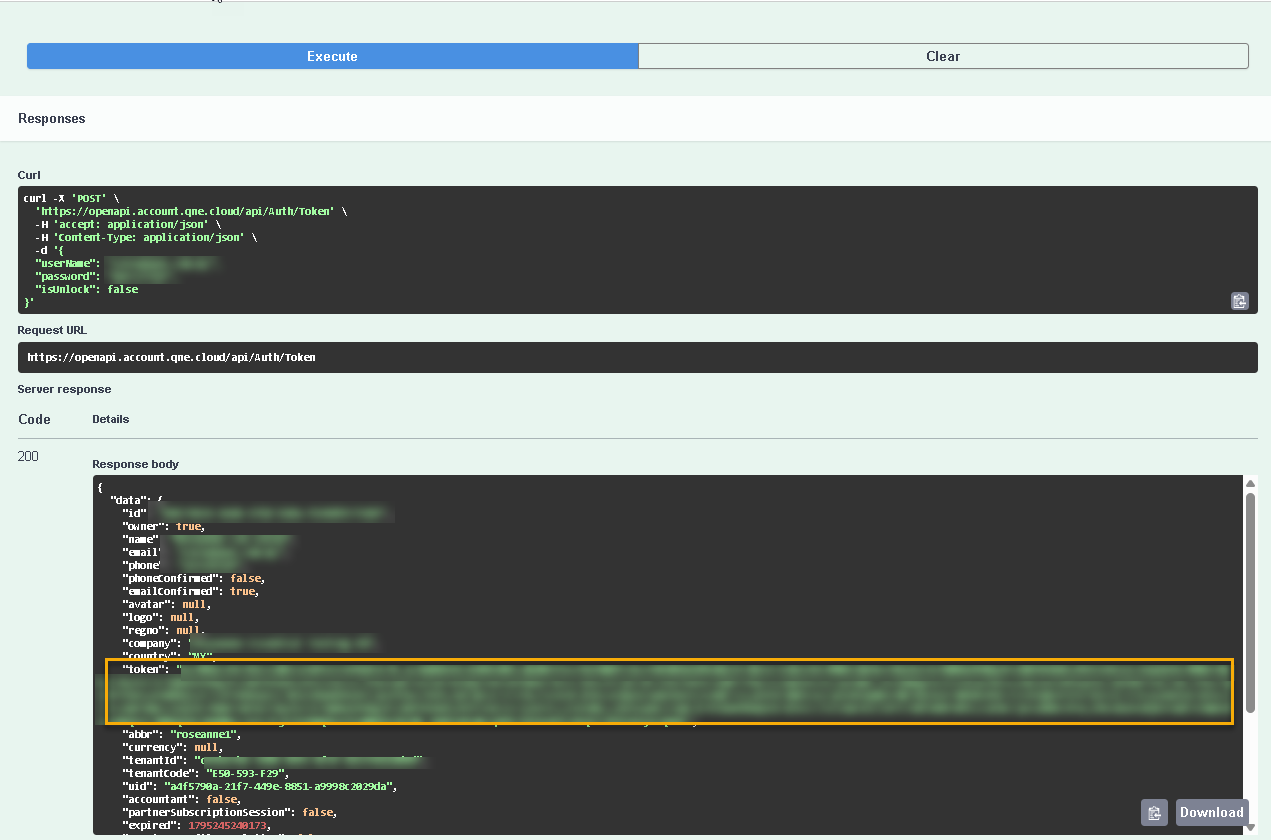
5. Copy the value of “token” (without the quotation marks).
Part B – Authorize
6. Scroll up to the top of the page and click Authorize.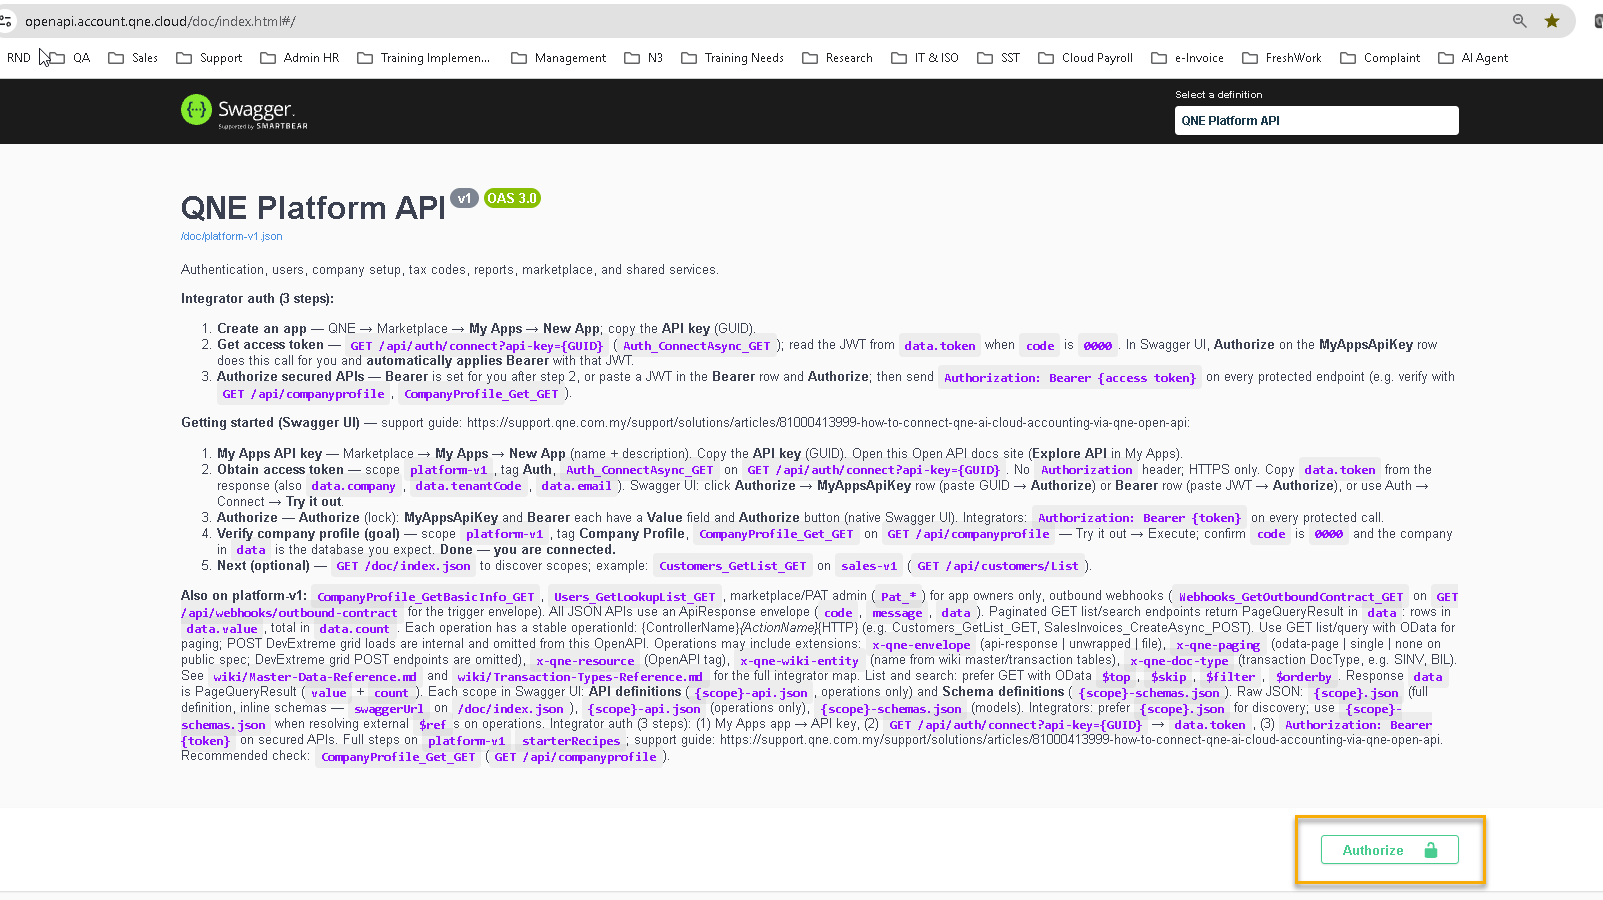
7. Under Bearer, type Bearer, a space, then paste the token you copied. Example: Bearer eyJhbGciOi…
Remark: There must be a space between Bearer and the token (Bearer <space> token).
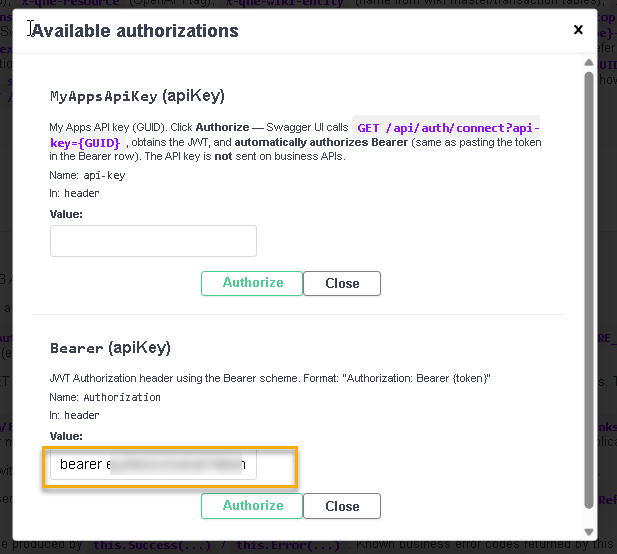
8. Click Authorize, click Close. The lock icons on the endpoints will now show as locked (authorized).
Part C – Verify the Connection
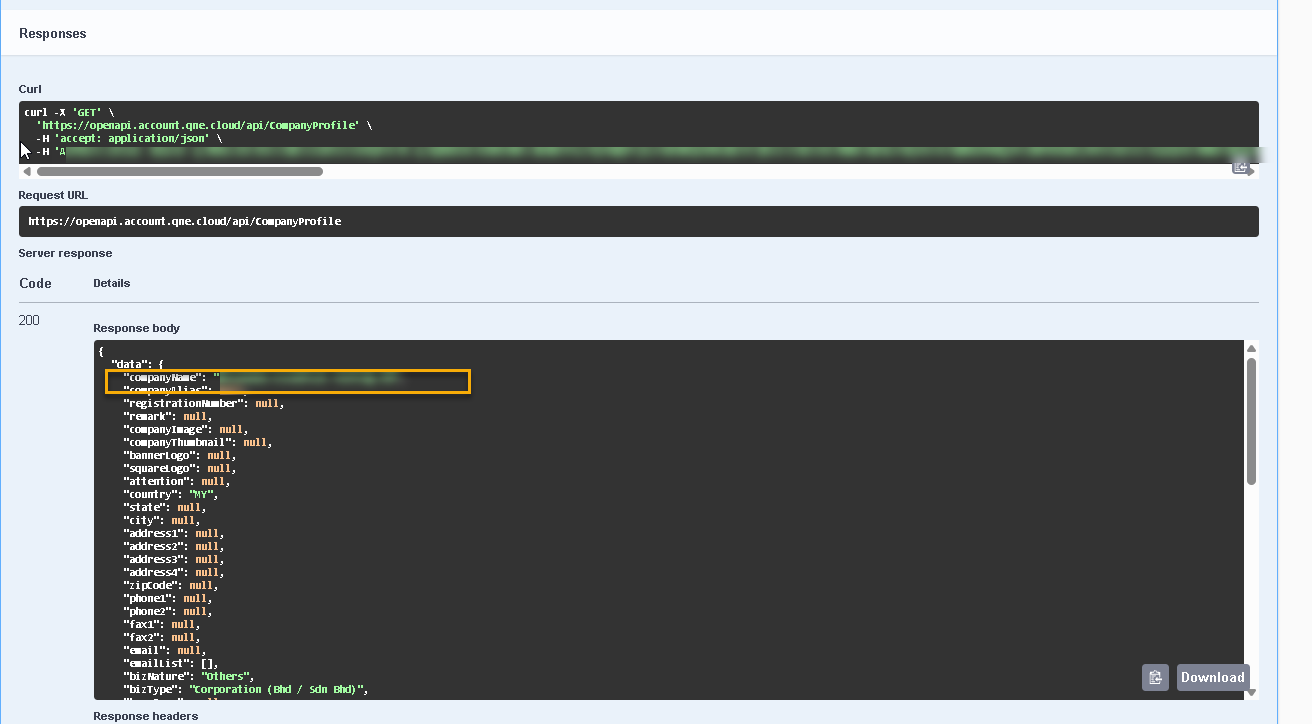
9. Go to Company Profile > GET /api/CompanyProfile > click Try it out.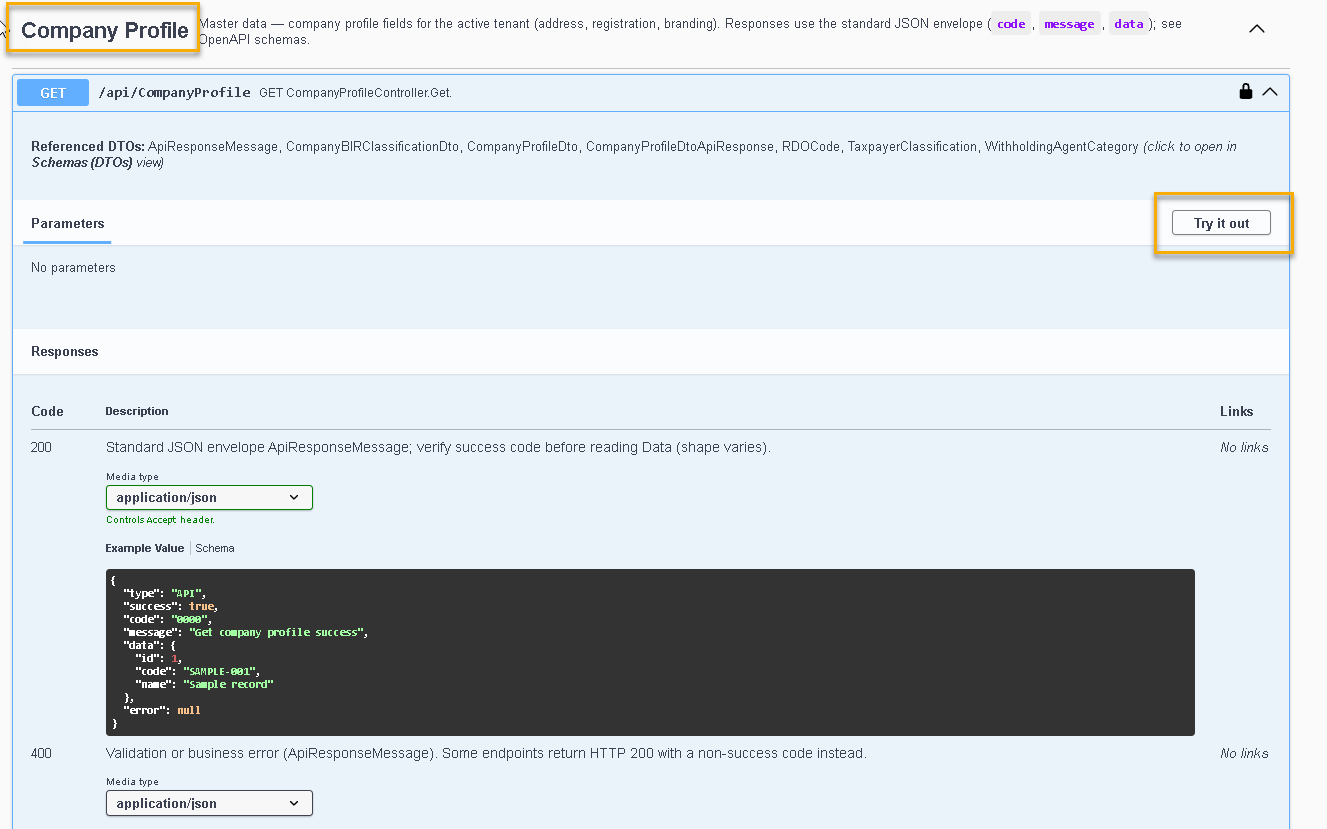
10. Click Execute.
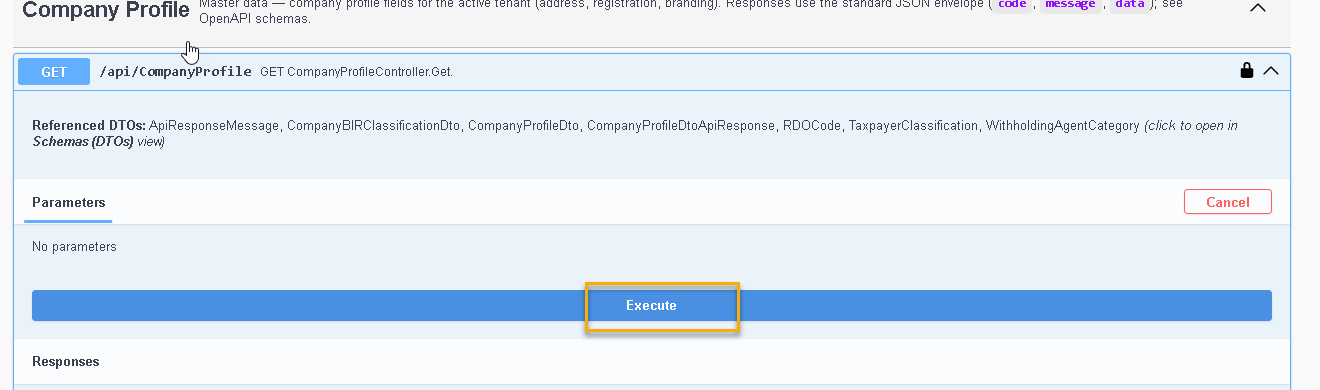
11. In the Response body, check “companyName” shows the correct company. If yes, the connection is successful and you can start using the other endpoints.
Part D – Switch to Another Company (Optional)
12. Go to Companies > GET /api/Companies/Accessible > click Try it out.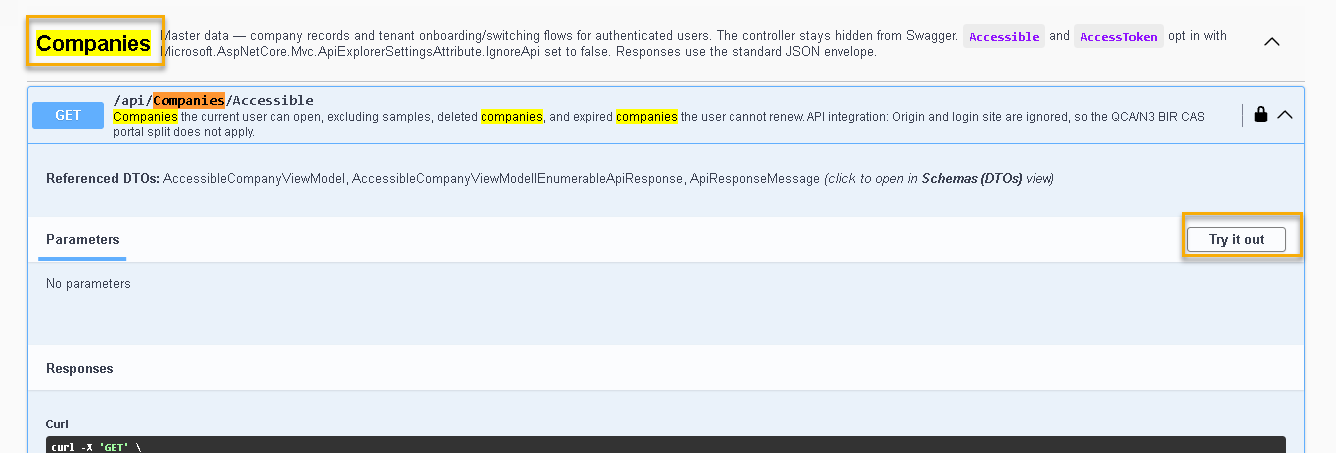
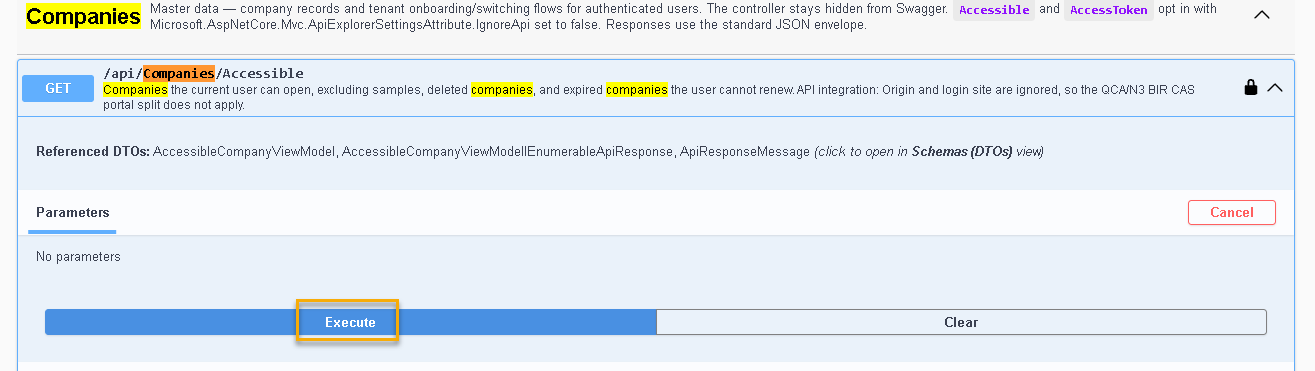
13. Click Execute.
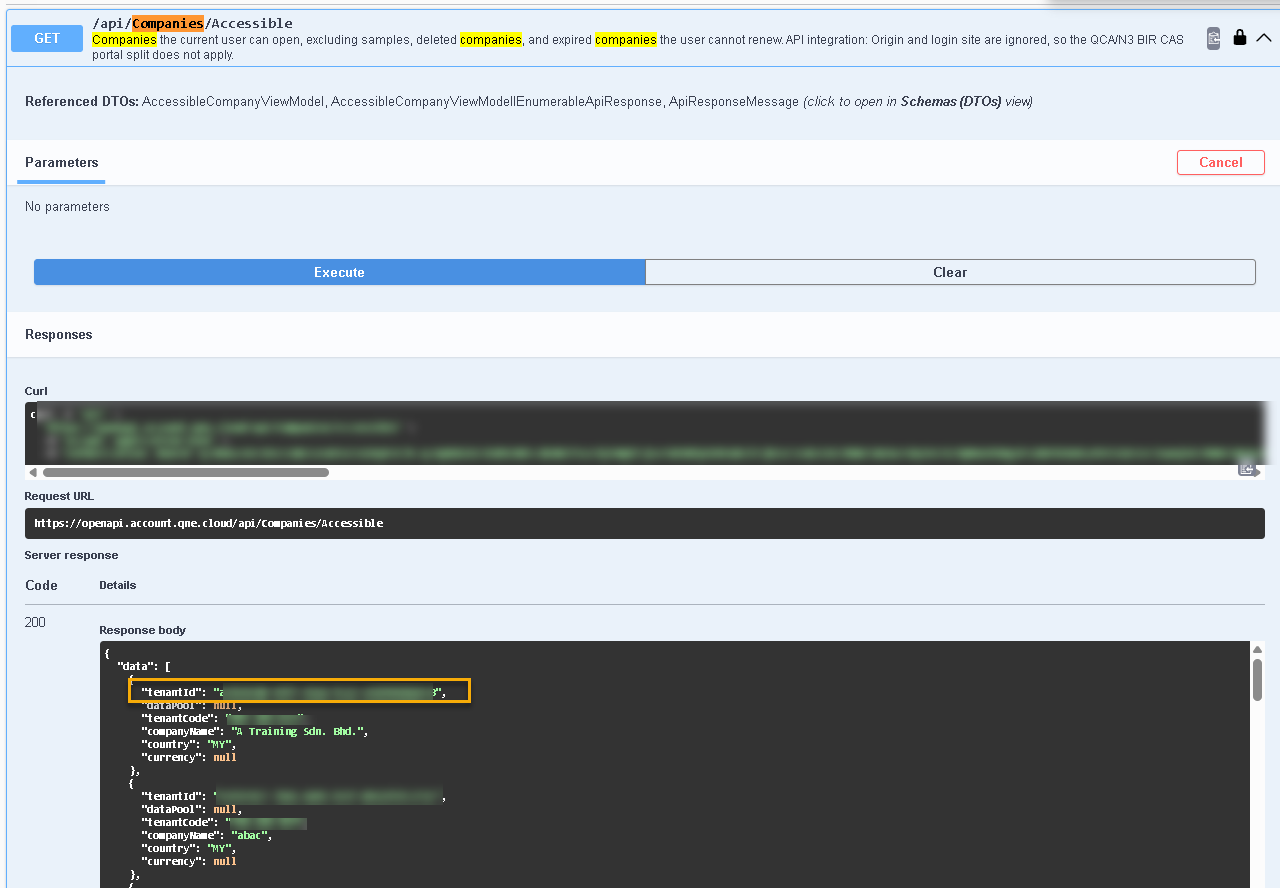
14. In the Response body, look for the company you want to access and copy its “tenantId”.
15. Go to POST /api/Companies/AccessToken > click Try it out. Paste the tenantId into the Request body, then click Execute.
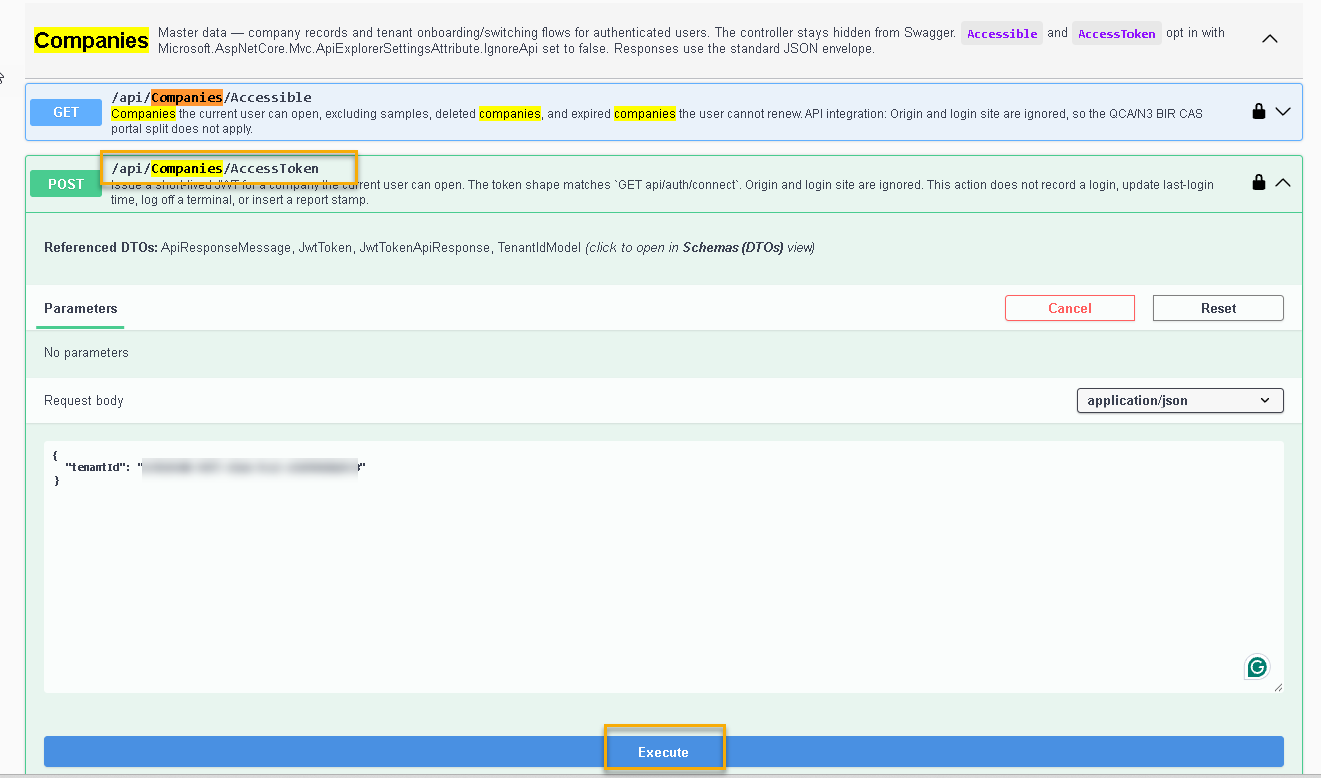
16. In the Response body, copy the new “token”.
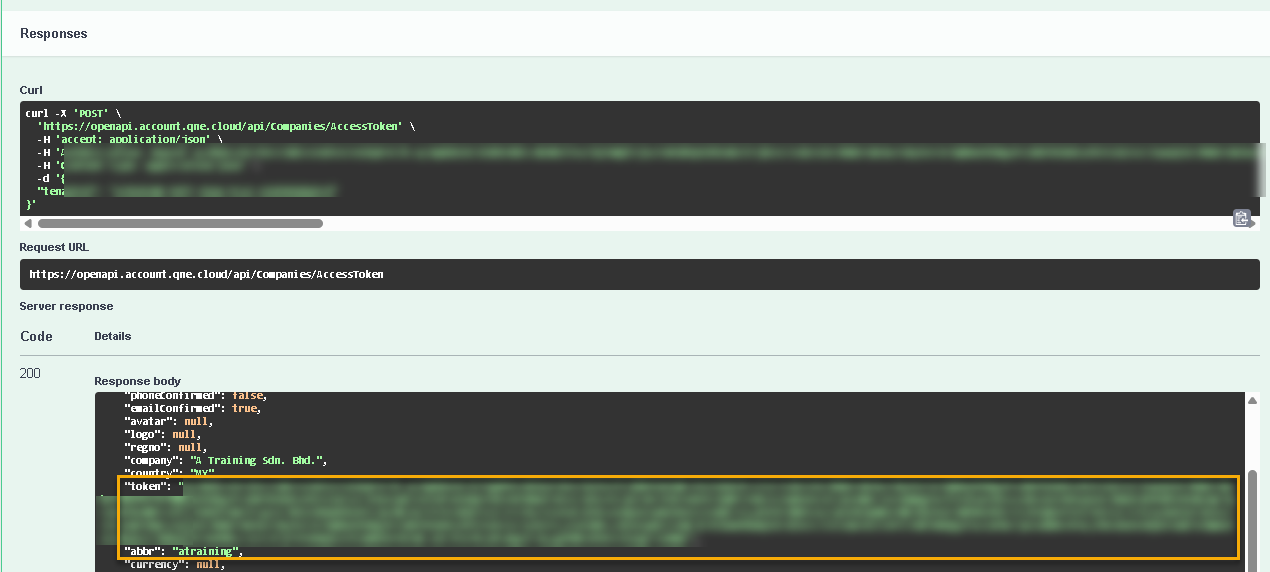
17. Click Authorize > Logout to clear the old token, then repeat Steps 6 to 8 with the new token. After that, repeat Steps 9 to 11 to confirm the company name has changed.
Was this article helpful?
That’s Great!
Thank you for your feedback
Sorry! We couldn't be helpful
Thank you for your feedback
Feedback sent
We appreciate your effort and will try to fix the article